
Please read my page on preserving before attempting this recipe.
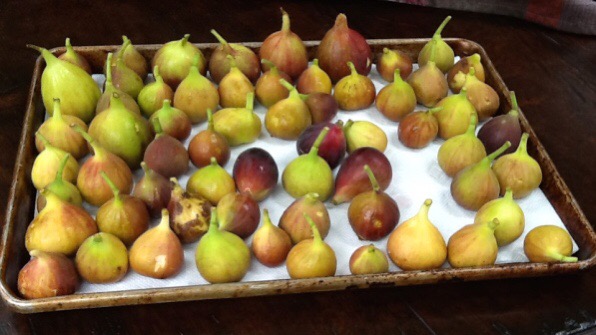
I used to limit my choice of fresh figs to the ones my Uncle grows in his back yard or those from a farmer who brings his locally grown figs, called “Chicago Hearty” to market in early September. My Uncle has several fig trees, all children of the fig tree that my Great Grandfather Ben Sala grew in his back yard in Chicago. Great Grandpa Ben grew his fig tree from a cutting he brought with him from Sicily when he immigrated to Chicago, Illinois in 1920. All of my uncles fig trees come from that tree that grew in my great grandpas back yard at Diversey and California. Lately, I’ve been able to find very nice Black Mission figs from California at our local Whole Foods or Trader Joe and they are making very good preserves. Make sure you taste one before you invest in making preserves. They should have some flavor although the flavor will intensify with cooking.
My family has a long standing love affair with Earl Grey tea. It’s one of my favorite teas to drink. My husbands favorite cake from his childhood was an Earl Grey pound cake from Dalloyau Patisserie in Paris. While they don’t make that pound cake anymore they do make an Earl Grey macaroon which my son loves. I created this preserve for the men in my life.
Julie
FIG/ EARL GREY PRESERVES
- 1000 grams fresh local figs
- 800 grams superfine sugar ( Depending on the sweetness of the figs you can reduce to 750 grams but don’t go below that or you’ll risk the integrity of the color and texture).
- pinch of salt
- 60 grams fresh lemon juice ( save the rinds, seeds and membranes from the lemons for your pectin bag)
- 1 Tablespoon of premium Earl Grey tea. I use Earl Grey Royale from The Tea House that has real pieces of bergamot in the tea and not just oil.
You will also need: - A preserving pan
- An unbleached, food grade muslin bag about 5″x7″.
- six 6 oz glass jars with lug tops lined with Plastisol ( you will probably only get 5 but I always sterilize an extra one)
- a 3 quart heat proof container
- a piece of parchment paper cut to the size of the top of the 3 quart container
- A heat proof measuring cup
- a wood skewer
- a lint free kitchen towel
DAY ONE:
 1. Wash figs and cut of the stems. Cut into medium dice, or any shape you please, putting them into a non reactive container and layering them with the lemon juice and sugar and a pinch of salt. When all the figs, sugar and lemon juice is in the bowl, let it macerate on the kitchen counter until about half the sugar has liquified.
2. Make the Earl Grey tea by placing 1/4 cup of water and 1 tablespoon of tea into a microwave safe glass or small bowl and microwave until the water boils. Let the tea steep in the water for exactly 3 minutes. Holding a fine meshed strainer over the figs, pour the tea, including the leaves, into the strainer and let it drip over the figs. Take the back of a spoon and press the tea leaves against the mesh of the strainer, pressing out as much liquid as possible. If you want more of the Bergamot flavor, just brew a little more tea.
3. Take the lemon rinds, seeds and membranes, put them in your muslin bag. Draw the bag closed, bend over the neck and tie the string around the neck. This keeps seeds from floating out of the top of the neck.
4. Clean your copper preserving pan With white vinegar, kosher salt and enough flour to make a thin paste.
5. Place the figs and the muslin bag in the preserving pan over low heat until the sugar dissolves, then raise the heat to high. When the liquid just comes to a simmer, pour the contents of the pan into a non reactive heat proof container and fit the piece of parchment paper right on the top of the preserves. Cover the preserves with the top of the container or plastic wrap. The parchment will prevent the top pieces of fruit from oxidizing. Let it rest in the refrigerator overnight. The purpose of this is to allow the sugar syrup to slowly penetrate the fruit. This helps the pieces retain some shape.
DAY TWO:
1. Remove the figs from the refrigerator and run about 1/3 through a food mill set with the disc with the biggest holes. Stir them back in to the rest of the figs.
2. Place your glass jars, ladle and measuring cup in the oven and turn the temperature to 225 degrees farenheit. When it’s 225 degrees set your timer for 10 minutes. When the timer goes off everything on the tray will be sterilized and you must keep it in the oven until your preserves are ready.
3. Place a metal sheet pan in the freezer. You will use this to test your gel.
4. Clean your preserving pan again.
5. Place the fruit and pectin bag over high heat, stirring frequently to aid evaporation and keep the contents from sticking. When the mixture reaches a temperature of 100 degrees celsius or 212 Fahrenheit take the pan off the heat.
5. Take out the pectin bag and let it cool until you can squeeze it without burning your hands. Squeeze it hard, over the pan, to get all the pectin out of the bag and into the preserves. It will feel slimy.
6. Put the pan back on high heat and start testing for a gel. At 100 degrees centigrade it is pasteurized. After that point, how much more you cook down your preserves is a matter of taste. I like to cook them as little as possible to preserve the fresh taste and avoid caramelizing. The trade off can be a preserve that is a little runny. There are several ways to test for a gel but my preferred method is this: Take a small spoon of the hot preserves and put a large drop on the cold sheet pan (take your preserves off the burner while your testing so it doesn’t over cook). When the drop of preserve feels cool, give it a little push. If it wrinkles, even slightly, it’s done. If it doesn’t wrinkle put the pan back on the high flame and boil it for another minute or two. Repeat the test until you get the wrinkle.
7. Take your jars out of the oven and put them near the preserving pan. Bring the preserves to a boil and immediately turn of the heat. Use your ladle to pour preserves into the spouted measuring cup and carefully but quickly pour the preserves almost to the top of the jars, leaving about 1/8″to 1/4″ Space at the top. If you fill them all the way to the top they won’t seal.
8. When all the jars are filled, take your wooden skewer and wiggle it around the inside of the jar to release any air bubbles. Wipe the rims with a clean, lint free towel moistened with hot water. Screw on the lids so that they are snug but not over tightened. I like to do this with my non dominant hand.
9. Put the jars on racks to cool and leave them undisturbed until they are completely cool. If you are in the room where they are cooling you should hear a pop for each jar as it seals. When they are cool check the seal by pressing down on the center of the lid. It should not wiggle. If it does, stick that one in the refrigerator because that indicates a failed seal and it will not be shelf safe.
~~~~~~~~~~~~~~~~~~~~~~~~~~~~~~~~~~~~~~~~~~~~~~~~~~~~~~~~~~~~~~~~~~~~~~~~~
I follow this two day procedure for all my for all my preserves. While they will be shelf stable for a year they do start to oxidize after 6 months and I like to eat them within that 6 month period if possible.
© Julie de Lara and onemorebitedelara.com 2017
